[Guide] The release of TensorFlow.js can be said to be the gospel of JS community developers! However, there are still some problems and differences in training some models in the browser. How can we make the training effect better? The author of this article is a front-end engineer. After his continuous accumulation of experience, he has summarized 18 Tips for everyone, hoping to help you train a better model.
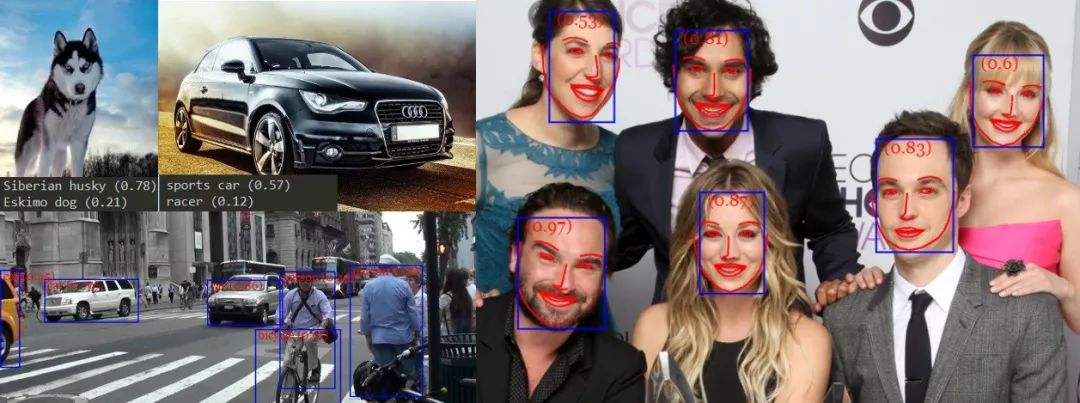
After the release of TensorFlow.js, I imported the previously trained target/face detection and face recognition models into TensorFlow.js. I found that some models run quite well in the browser. It feels that TensorFlow.js has made us become more front-end.
Although browsers can also run deep learning models, these models are not designed to run in browsers, so many limitations and challenges will follow. Take target detection as an example, not to mention real-time detection, it may be difficult to maintain a certain frame rate. Not to mention the pressure that the hundreds of megabytes model puts on the user's browser and bandwidth (in the case of mobile phones).
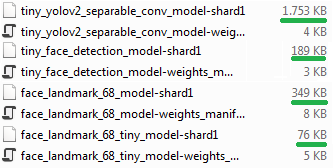
However, as long as we follow certain principles, training a decent deep learning model in the browser with convolutional neural network CNN and TensorFlow.js is not a dream. As you can see from the figure below, the sizes of the models I trained are all controlled below 2 MB, and the smallest is only 3 KB.
You may have a question in your mind: Are you mentally disabled? Want to train the model with a browser? Yes, using your own computer, server, cluster or cloud to train deep learning models is definitely a right way, but not everyone has the money to use NVIDIA GTX 1080 Ti or Titan X (especially after the collective price increase of graphics cards). At this time, the advantage of training the deep learning model in the browser is reflected. With WebGL and TensorFLow.js, I can easily train the deep learning model with the AMD GPU on the computer.

For the problem of target recognition, for the sake of safety, it is usually recommended that you use some ready-made architectures such as YOLO, SSD, residual network ResNet or MobileNet, but I personally think that if you copy it completely, the training effect on the browser is definitely not good. Training on the browser requires the model to be small, fast, and easy to train, the better. Let's take a look at how to achieve these three points in terms of model architecture, training, and debugging.
Model architecture
▌1. Control model size
It is important to control the size of the model. If the model architecture is too large and complex, the speed of training and running will be reduced, and the speed of loading the model from the browser will also be slower. Controlling the scale of the model is simple, but it is difficult to achieve a balance between accuracy and model scale. If the accuracy rate is not up to the requirement, no matter how small the model is, it is a waste.
▌2. Use depth separable convolution operation
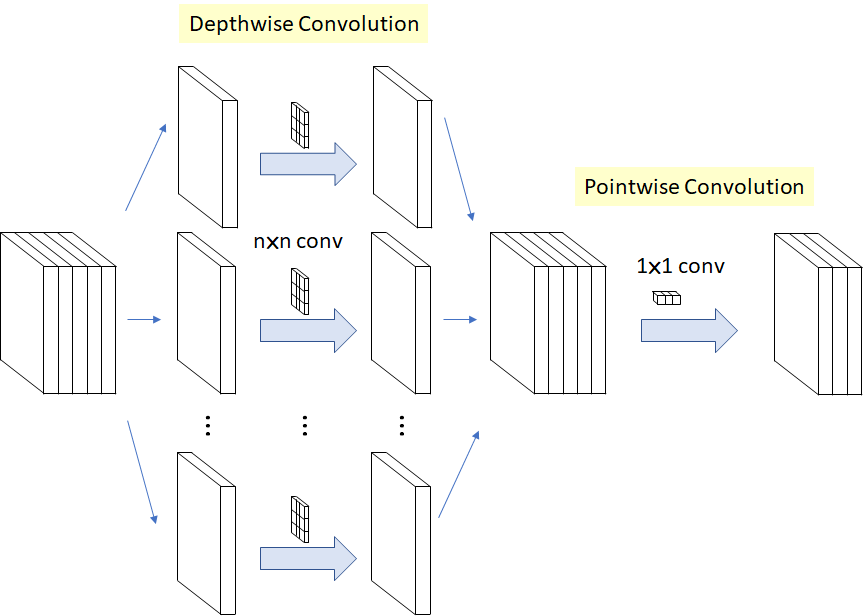
Different from the standard convolution operation, the depth separable convolution first performs the convolution operation on each channel, and then performs the 1X1 cross-channel convolution. The advantage of this is that the number of parameters can be greatly reduced, so the running speed of the model will be greatly improved, and the resource consumption and training speed will also be improved. The process of the depth separable convolution operation is shown in the following figure:
Both MobileNet and Xception use deep separable convolutions, and you can also see deep separable convolutions in the TensorFlow.js version of MobileNet and PoseNet. Although the effect of deep separable convolution on the accuracy of the model is still controversial, from my personal experience, it is definitely correct to train the model in the browser.
For the first layer, I recommend using standard conv2d operations to maintain the relationship between the extracted features. Because there are not many general parameters in the first layer, it has little effect on performance.
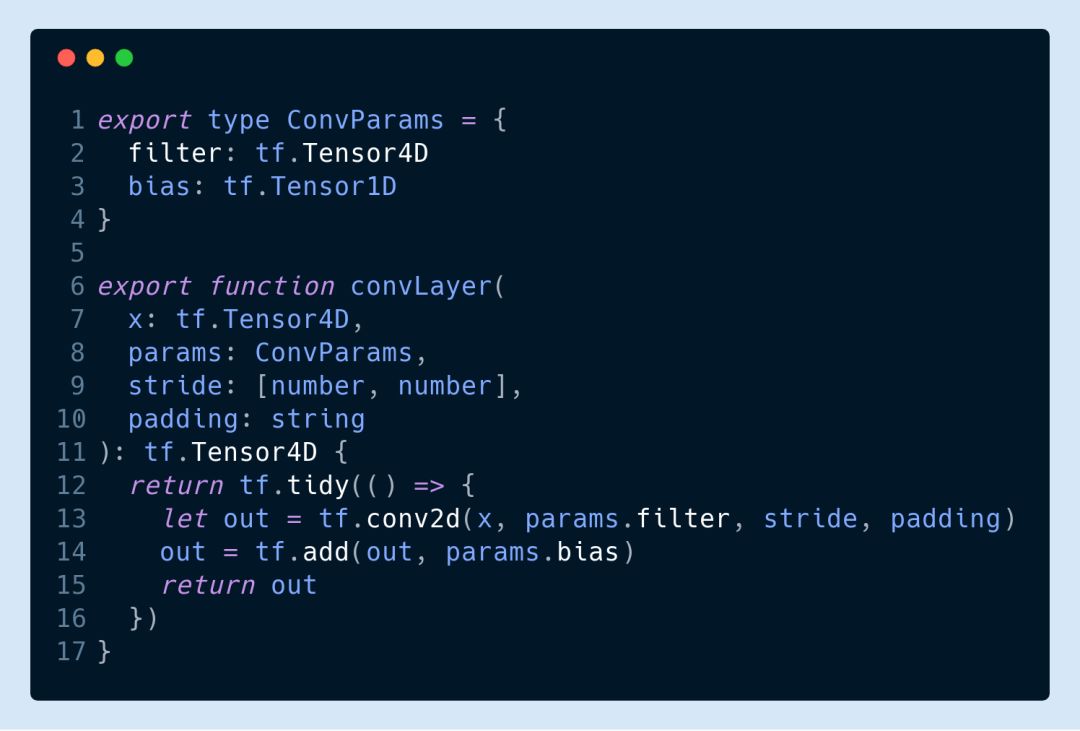
The other convolutional layers can all be convolved with depth separable. For example, here we use two filters.
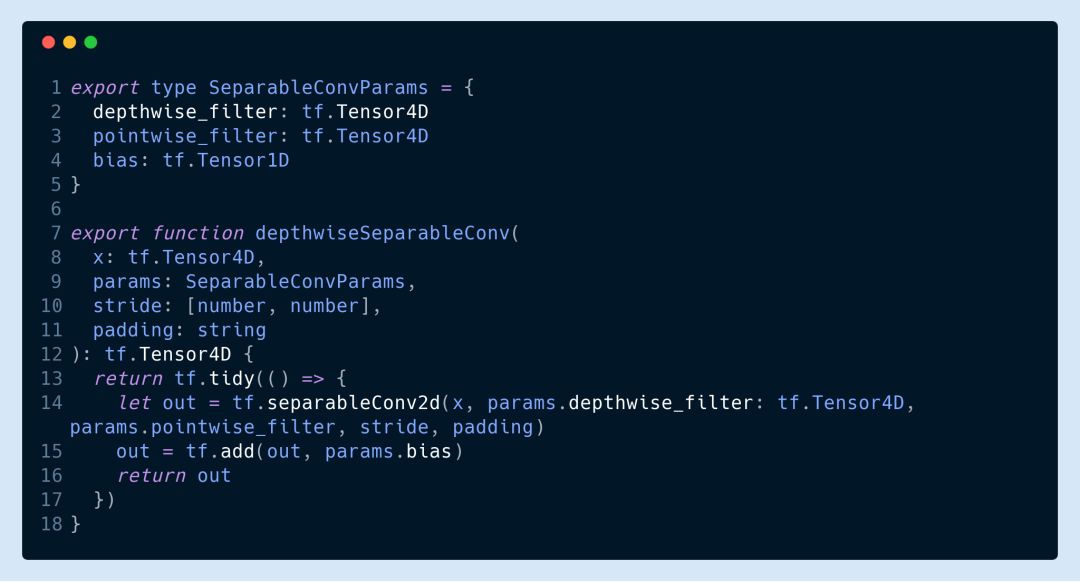
Here, the convolution kernel structures used by tf.separableConv2d are [3,3,32,1] and [1,1,32,64].
▌3. Use jump connections and dense blocks
As the number of network layers increases, the possibility of the disappearance of the gradient will increase. The disappearance of the gradient will cause the loss function to drop too slowly and the training time is too long or it fails altogether. The skip connection used in ResNet and DenseNet can avoid this problem. Simply put, jump connection is to pass the output skip activation function of some layers directly to the hidden layer deep in the network as input, as shown in the following figure:

This avoids the problem of the disappearance of the gradient caused by the activation function and the chain derivation, and we can also increase the number of layers of the network according to the demand.
Obviously, one of the requirements implicit in the jump connection is that the format of the output and input of the two layers of the connection must be compatible. If we want to use a residual network, it is best to ensure that the number and filling of the filters in the two layers are the same and the stride is 1 (but there must be other ways to ensure that the format corresponds).
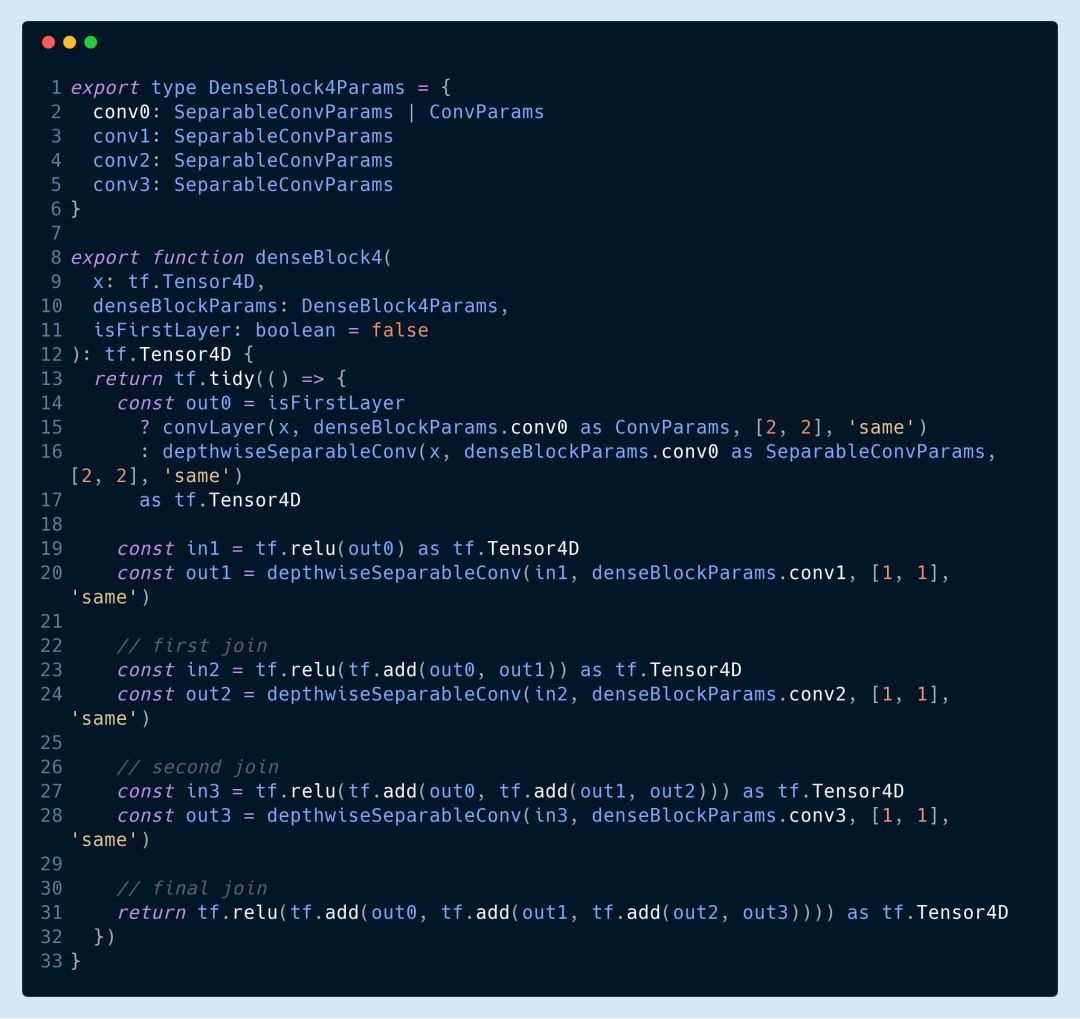
At the beginning, I imitated the idea of ​​residual network and added a jump connection every other layer (as shown in the figure below). However, I found that dense blocks work better, and the model converges much faster than adding jump connections.

Let's take a look at the specific code below. The dense block here has four depth separable convolutional layers. In the first layer, I set the stride to 2 to change the size of the input.
▌4. Select ReLU for activation function
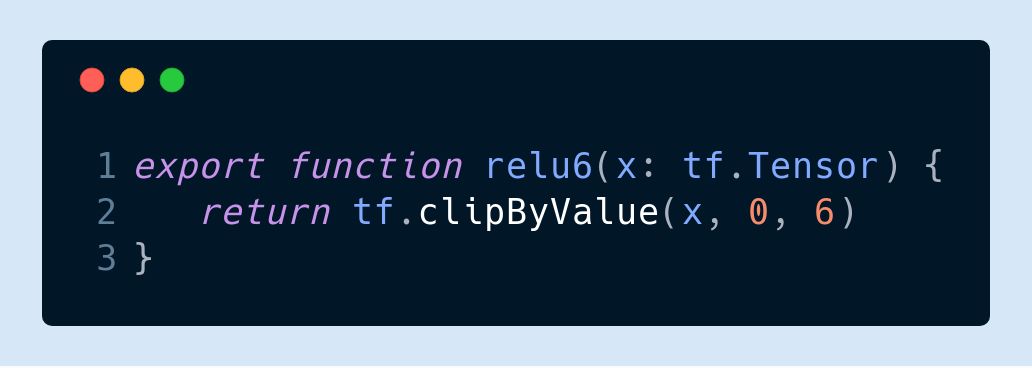
If you train the deep network in the browser, the activation function does not need to look at and select ReLU directly. The main reason is that the gradient disappears. But you can try different variants of ReLU, such as

ReLU-6 used with MobileNet (y = min(max(x, 0), 6)):
Training process
▌5. Choose Adam as the optimizer
This is also my personal experience only to talk about. Before using SGD, it often got stuck in a local minimum or a gradient explosion occurred. I recommend that everyone set the learning rate to 0.001 at the beginning and use the default for other parameters:

▌6. Dynamically adjust the learning rate
Generally speaking, we should stop training when the loss function no longer drops, because retraining will overfit. However, if we find that the loss function oscillates up and down, we may make the loss function smaller by reducing the learning rate.
In the following example, we can see that the learning rate is set to 0.01 at the beginning, and then there is an oscillation (yellow line) from the 32nd period. Here, the loss function is reduced by about 0.3 by changing the learning rate to 0.001 (blue line).

▌7. Weight initialization principle
I personally like to set the bias to 0 and the weights to use the traditional normal distribution. I generally use the Glorot normal distribution initialization method:

▌8. Disrupt the order of the data set
It's a commonplace talk. In TensorFlow.js we can use tf.utils.shuffle to achieve.

▌9. Save the model
js can use FileSaver.js to realize the storage (or download) of the model. For example, the following code can save all the weights of the model:

The format of saving is determined by yourself, but FileSaver.js only saves it, so here we need to use JSON.strinfify to convert the Blob into a string:

debugging

▌10. Ensure the correctness of pre-processing and post-processing
Although it is a nonsense sentence, "junk data garbage results" is really a well-known saying. Marking should be correct, and the input and output of each layer should be consistent. Especially if you have done some pre-processing and post-processing on the pictures, you must be more careful. Sometimes these small problems are harder to find. So although it takes some effort, the sharpening of the knife does not cut the wood by mistake.
▌11. Custom loss function
TensorFlow.js provides a lot of ready-made loss functions for everyone to use, and generally speaking, they are enough, so I don't recommend that you write them yourself. If you really want to write it yourself, please be sure to test it first.
▌12. Tried over-fitting on a subset of the data
I suggest that after the model is defined, you first pick a dozen or twenty graphs to try to see if the loss function has converged. It is best to visualize the results so that it is obvious whether the model has the potential to succeed.

In this way, we can also find some low-level errors in the model and preprocessing early. This is actually the test loss function mentioned in Article 11.
performance
▌13. Memory leak
I don't know if you know that TensorFlow.js will not automatically collect garbage for you. The memory occupied by the tensor must be released manually by calling tensor.dispose(). If you forget to recycle, memory leaks will happen sooner or later.
It is easy to determine if there is a memory leak. You can output tf.memory() every iteration to see the number of tensors. If it does not increase all the time, it means there is no leakage.

▌14. Adjust the canvas size, not the tensor size
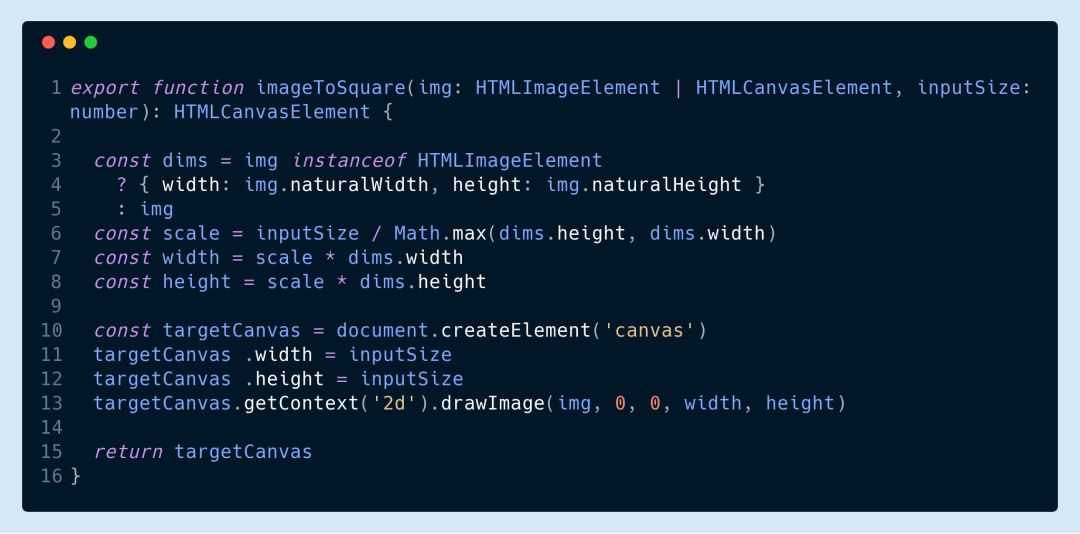
Before calling TF. From pixels, to convert the canvas to a tensor, please adjust the size of the canvas, otherwise you will quickly run out of GPU memory.
If your training images are all the same size, this will not be a problem, but if you have to adjust their size explicitly, you can refer to the code below. (Note that the following statement is only valid in the current state of tfjs-core, I am currently using tfjs-core version 0.12.14)
▌15. Choose the batch size carefully
The number of samples in each batch, that is, the batch size, obviously depends on what GPU and network structure we use, so it is best for you to try different batch sizes to see how the fastest. I usually start from 1, and sometimes I find that increasing the batch size does not help the efficiency of training.
▌16. Make good use of IndexedDB
Our training data set is sometimes quite large because it is all pictures. If it is downloaded every time, the efficiency is definitely low, and it is best to use IndexedDB to store it. IndexedDB is actually a local database embedded in the browser, and any data can be stored in the form of key-value pairs. Reading and saving data can be done with just a few lines of code.
▌17. Return the loss function value asynchronously
If you want to monitor the loss function value in real time, you can use the following code to calculate it yourself and return asynchronously:
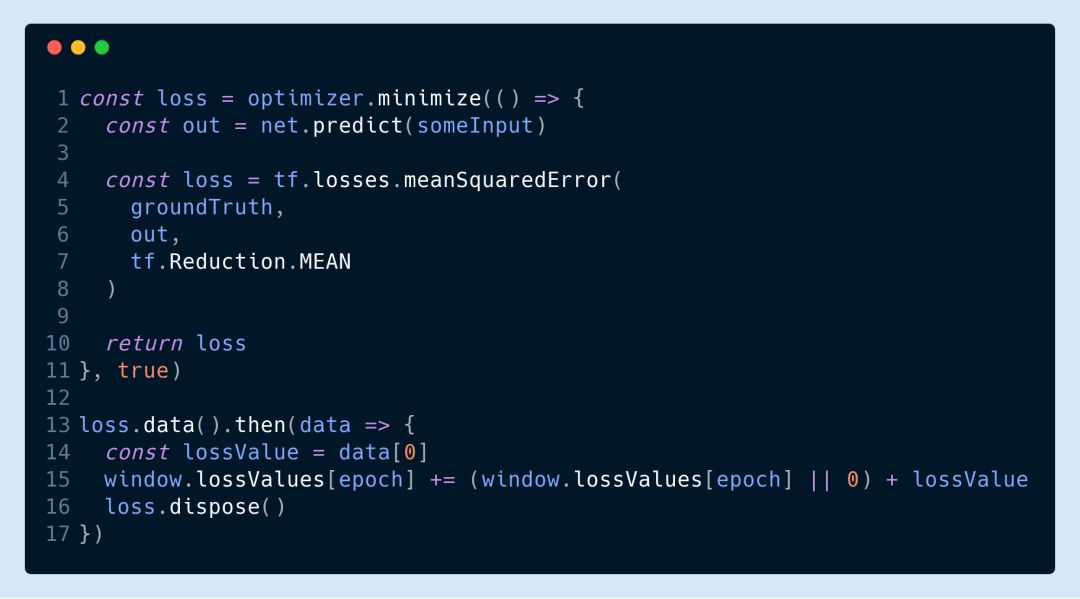
It should be noted that this code is a bit problematic if the value of the loss function is stored in the file after each training period. Because the value of the loss function is now returned asynchronously, we have to wait for the last promise to return before we can save it. However, I generally violently wait 10 seconds after the end of a period to save:

▌18. Quantification of weight
In order to achieve the goal of being small and fast, after the model training is completed, we should quantify the weights to compress the model. Weighting can not only reduce the size of the model, but also help increase the speed of the model, and almost all benefits are not harmful. This step allows the model to be small and fast, which is very suitable for us to train deep learning models in the browser.
The eighteen tricks (actual seventeen tricks) of training deep learning models in the browser are summarized here. I hope everyone can gain something after reading this article.
If you have any questions, please leave us a message in the background and discuss it together!
1800W Carbon Fiber Heater,3 Steps Carbon Fibre Patio Heater,Carbon Fibre Room Heater,Carbon Fibre Radiant Heater
Foshan Shunde Josintech Electrical Appliance Technology Co.,Ltd , https://www.josintech.com