This year's Apple conference can be said to have a lot of highlights, iPad Pro, iPhone 6s/6s Plus, Apple TV and other star products accounted for most of the conference, our main character today - iPad mini4 silently completed a conscience Upgrade, let's take a look at what upgrades are available for the iPad mini4. (The following pictures are from iFixit)

Positive iPad mini 4.
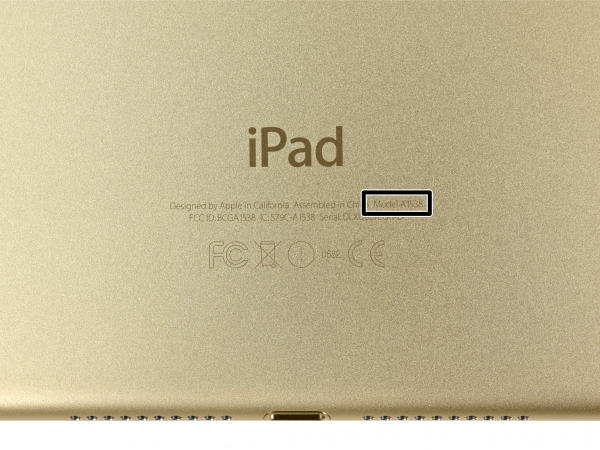
The iPad mini 4 uses a second-generation 64-bit A8 processor + M8-assisted processor + 2G RAM, which is thinner, lighter, and stronger than previous generations.

Compared to the iPad mini 3 dark space gray version, the iPad mini 4 uses local gold color, the thickness is reduced by 18%, and the speaker hole becomes larger.
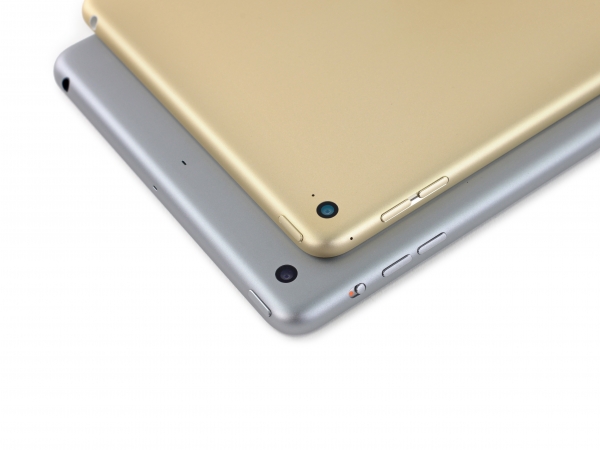
The rotary lock on the side is cancelled and the camera uses sapphire glass.
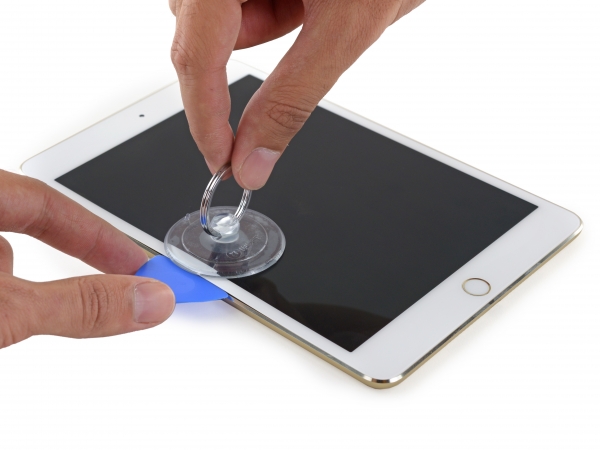
Use a paddle + suction cup to open a gap from the front panel.
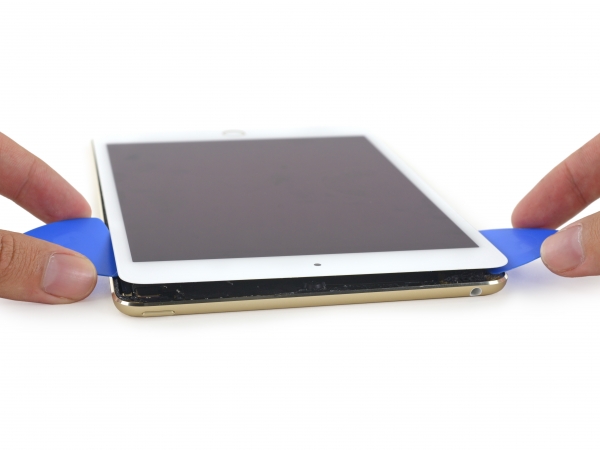
Then use the paddle to gently open the gap.

In this way, the front panel can be opened.

Remove the two screws that secure the battery cable.
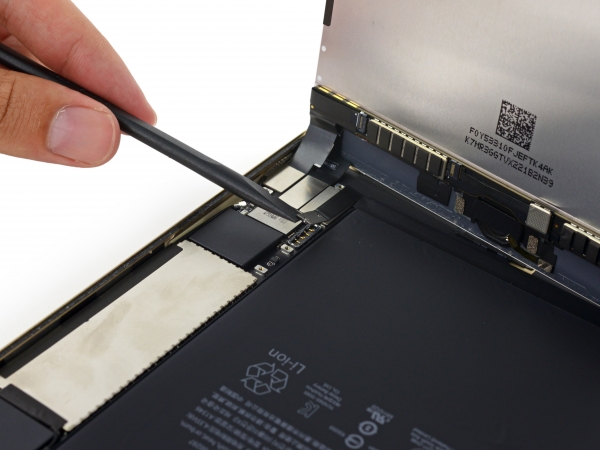
Tilt the battery cable with a crowbar.
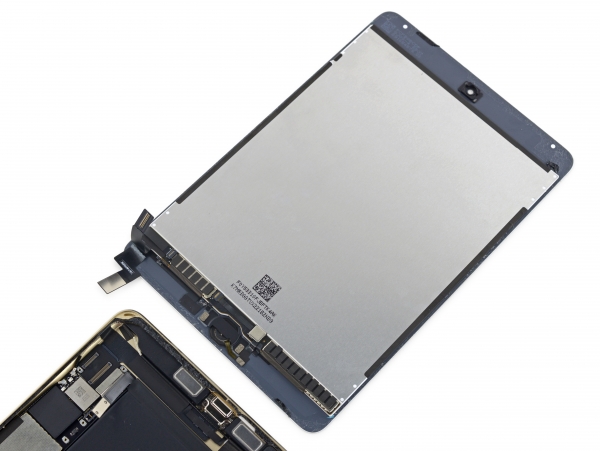

The iPad mini 4 screen adopts a full-fitting process, but the overall process is the same as the previous generation, with no major changes. The mini 3 is fixed with a hot glue to hold the button assembly. This is especially good for maintenance. The Touch ID cable is integrated into the front panel, just like the iPad Air 2.
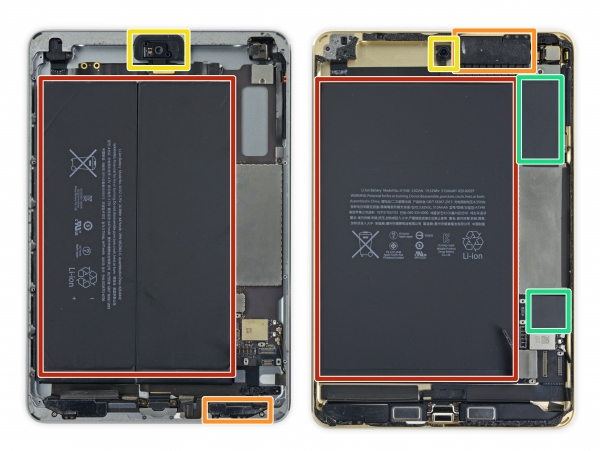
Compared with iPad mini 3, the right is iPad mini 4
Red: The battery capacity becomes smaller, from two pieces to one, but the battery is thinner
Orange: The antenna in the lower right corner moves to the upper right corner
Yellow: The front camera is getting smaller
Green: Plastic spacers fill the blank of the Wi-Fi subboard on the mini 4

Carefully unplug the cable, we can remove the antenna. Unlike previous designs, the mini4 cable was installed on the right side of the rear camera.
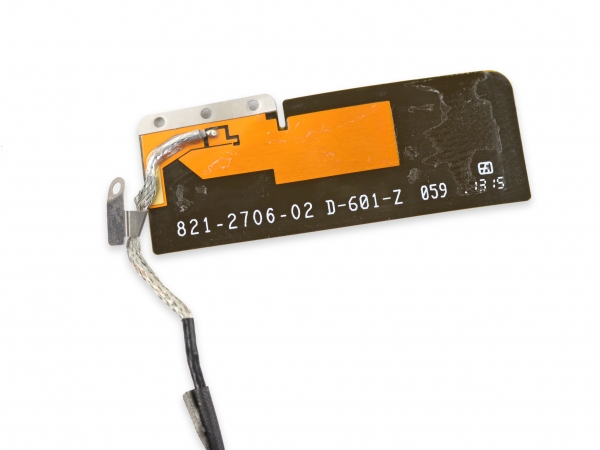
The mini4's antenna is small and a bit like the iPad Air's antenna.
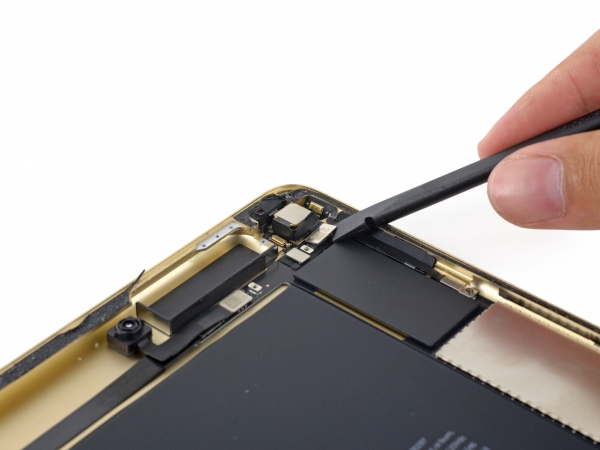
Unplug the cable, we can remove the camera.
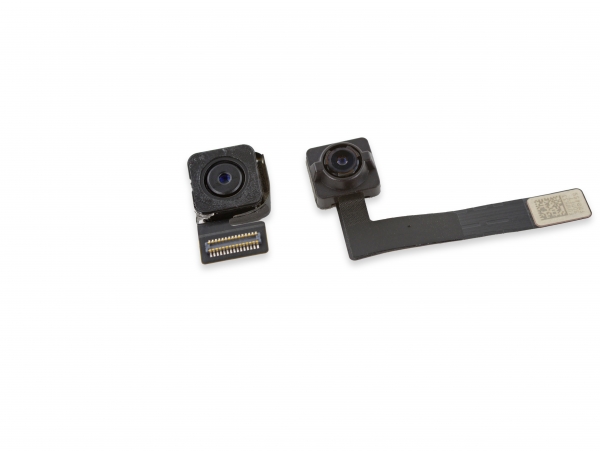
The mini 4 uses the same 8 megapixel iSight rear camera as the iPad Air, with a front camera of 1.2 million pixels.
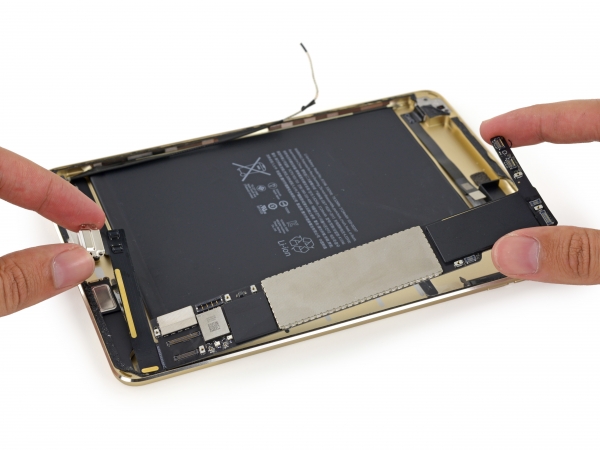
Now you can remove the motherboard.

Let's look at what chips are on the motherboard:
Red: Apple A8 SoC APL1011, and SK Hynix H9CKNNN8KTBUSR 2 GB LPDDR3 SDRAM
Orange: SK Hynix H2JTDG8UD1BMR 16 GB NAND Flash
Yellow: NXP Semiconductors 65V10 NFC Controller
Green: NXP Semiconductors LPC18B1UK (Apple M8 Motion Coprocessor)
Blue: Apple 338S1213 Audio Codec
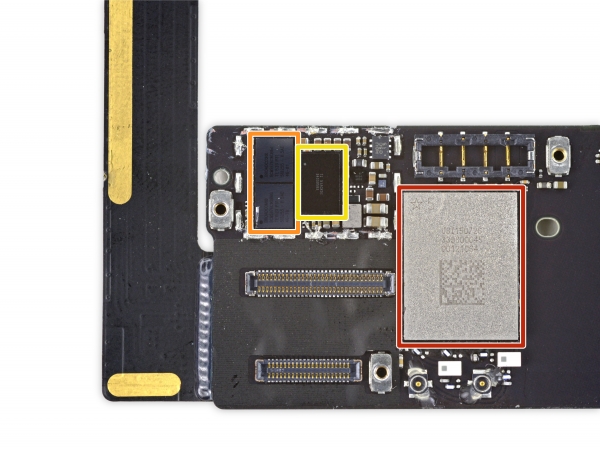
There are also many chips on the other side of the motherboard:
Red: Universal Scientific Industrial 339S00045 Wi-Fi module. (339S0213 used in iPad mini 3)
Orange: Broadcom BCM5976C1KUB6G Touch Screen Controller
Yellow: Texas Instruments 343S0583, consistent with iPad Air2
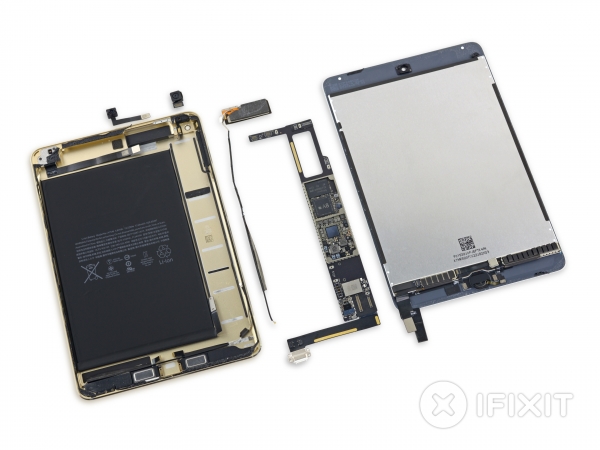
Well, our dismantling is here. Come to a family portrait. iFixit scored 2 points for the repair of the iPad mini4 (10 is the easiest to repair). This score is still relatively low, and a large area of ​​glue makes maintenance difficult. The biggest highlight of the machine is the fully-fitted screen. After the LCD and panel glass are fused together, the disassembly procedure is greatly simplified.
More fresh hot disassemble video, please pay attention to micro signal: jiuyaochai