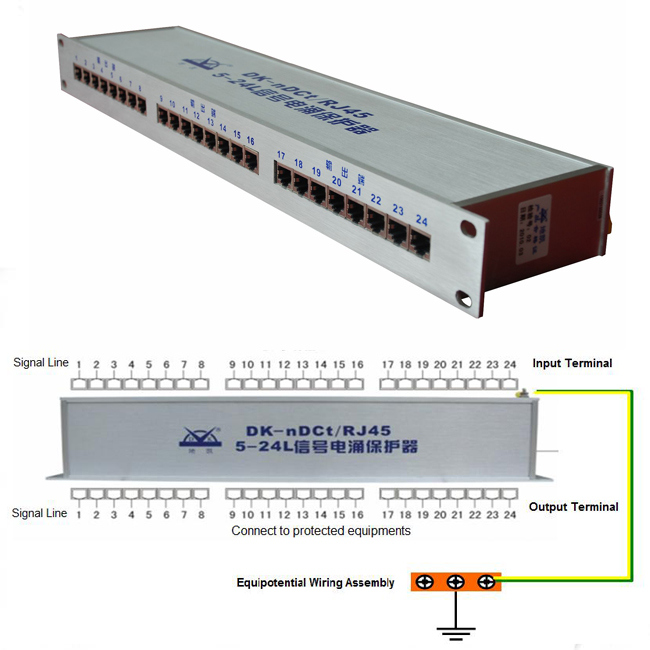
This multi-ports RJ45 Surge Protector is designed according to the IEC Standard. It is suitable for lightning surge protection of 10/100M network equipments. Its protection cores is 8 (12, 36, 45, 78) lines. It takes the advantagers of large throughput, fast response, easy installation and maintenance, ect. With 19" standard mounting rack, it can protect maximum 24 lines standard RJ45 ports.
8/20us maximum discharge current Imax can be 10kA/line. It is suitable for the lightning protection of high speed Internetwork.

Character
1. Maximum discharge current 10kA.
2. Standard RJ45 network connector surge over-load voltage protection.
3. 19" standard rack installation.
4. Multi grades earth discharge circuit, lowe limiting voltage.
5. High speed transmission tate, low loss.
6. RJ45 crystal input and output socket.
Technical Parameter
| Item | DK-nDCt/RJ45 | |
| Type | 5-12L Signal SPD | 5-24L Signal SPD |
| Shell Material | Aluminum Shell | |
| Shell Protection Level | IP20 | |
| Working Temperature | -40ºC to +85ºC | |
| Relative Humidity | Less than 95% | |
| Nominal Discharging Current In(8/20) | 5kA | |
| Maximum Discharging Current Imax(8/20) | 10kA | |
| Line-Line Limiting Voltage | Less than 30V | |
| Line-PE Limiting Voltage | Less than 90V | |
| Transmission Rate (bit/s) | 100M | |
| Insert Loss | Less than 0.5Â dB | |
| Impedance | 0.5Â Omega | |
| Connector Type | RJ45 | |
| Weight | 2.09kg | 1.56kg |
| Dimension | 481X96X45mm | |
| Quantity of Core Line under Protection | 1~8 Lines | |
| Quantity of Line under Protection | 12 Ports | 24 Ports |
| Installation Standard | 19" Rack-Mounted | |
| Art. No. | 1008009 | 1008010 |
Application Scope
1. Power and signal lightning protection of floor network exchange.
2. Power and signal lightning protection of network exchange in computer room.
Instruction Manual
1. Features
Clock display, 10 sets of adjustable timed power control, randomized power control, manual switch and optional DST setup.
2. First time charging
This timer contains a rechargeable battery. It is normal that the new/old model runs out of battery if it wasn`t being charged for a long period of time. In this case, the screen will not turn on.
To charge : simply plug the timer to a power outlet. The charging time should take at least 15 minutes.
If the screen doesn`t light up or displays garbled characters, simply reboot the system by pressing the [RESET" button.
3. Set clock

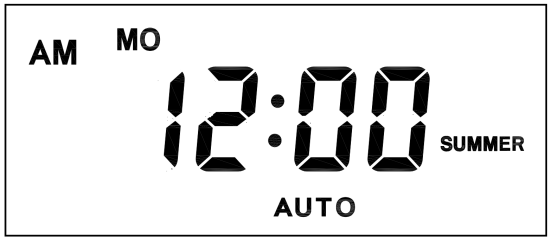
Hold [CLOCK" button and [WEEK" button to adjust week.
Hold [CLOCK" button and [HOUR" button to adjust hour.
Hold [CLOCK" button and [MINUTE" button to adjust minute.
Hold [CLOCK" button and [TIMER" button to select 12 hour/24 hour display.
Hold [CLOCK" button and [ON/AUTO/OFF" button to enable/disable DST (daylight-saving-time).
4. Set timer
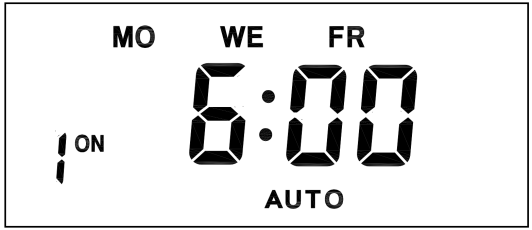
Press [TIMER" button, select and set timer. Setting rotation : 1on, 1off, 2on, 2off, ...... , 10on, 10off.
Press [HOUR" button to set hour for timer.
Press [MIN" button to set minute for timer.
Press [WEEK" button to set weekday for timer. Multiple weekdays can be selected. ex: if selected [MO", the timer will only apply on every Monday; if selected [ MO, WE, FR", the timer will apply on every Monday, Wednesday and Friday.

Press [RES/RCL" button to cancel the selected on or off timer. The screen will show "-- -- : -- --" , the timer is canceled.
Press [RES/RCL" button again to reactivate the timer.

When timers are set, press [CLOCK" to quit timer setting and return to clock.
5. Random function

Press [RANDOM" button to activate random function, press again to cancel function.
System only runs random function when [AUTO" is on.
Random function will automatically start the timer from 2 to 32 minutes after the setting.
ex : if timer 1on was set to 19:30 with the random function on, the timer will activate randomly between 19:33 to 20:03.
if timer 1off was set to 23:00 with the random function on, the timer will activate randomly between 23:02 to 23:32.
To avoid overlapping, make sure to leave a minimum of 31 minutes gap between different sets of timer.
6. Manual control
Displayed features:
ON : socket turns on.
OFF : socket turns off.
AUTO : socket turns on/off automatically via timer.
Manual ON setting
Press [ON/AUTO/OFF" button to switch from [AUTO" to [ON".
This mode allows socket of the device to power up. Power indicator will light up.
Manual OFF setting
Press [ON/AUTO/OFF" button to switch from [AUTO" to [OFF".
This mode turns socket of the device off. Power indicators will turn off.
7. Electrical parameters
Operating voltage : 230VAC
Battery : NiMh 1.2V
Power consumption : < 0.9W
Response time : 1 minute
Power output : 230VAC/16A/3680W
Q&A
Q: Why won`t my timer turn on?
A: It`s out of battery, you can charge the timer by plugging onto any power outlet. Charge the device for at least 15 minutes. Then press [RESET " button to reset the device.
Q: Can I set seconds of the timer?
A: No, the smallest time unit is minute.
Q: Does my timer keeps old settings without being plugged onto a power outlet?
A: Yes, the timer has an internal battery, it allows the timer to save settings without a power outlet.
Q: Is the battery rechargeable?
A: Yes, the battery is rechargeable. We recommend to charge it for 4 hours so the battery is fully charged.
Q: Does the timer needs internet connection?
A: The timer does not need internet.
Q: Does the screen have back light function?
A: It doesn`t support back light.
Digital Timer Socket, Timing Switch Socket, Electronic Timer Socket, Timer Socket
NINGBO COWELL ELECTRONICS & TECHNOLOGY CO., LTD , https://www.cowellsockets.com